Local setup
Introduction
This documentation is to help developers to setup the servers and dependencies required to implement and test h5p in boards. At the end of the setup, you should be able to run and use the h5p-editor and h5p-library-management apps without any failures.
Requirements
- Docker
- Git
Steps
Setting up a local S3 storage
If you already have a local S3 storage running, skip this step.
minio will be run in docker for storing h5p contents and libraries locally. You can start it with the following docker command:
docker run \
  --name minioS3storage \
  -p 9000:9000 \
  -p 9001:9001 \
  -e "MINIO_ROOT_USER=miniouser" \
  -e "MINIO_ROOT_PASSWORD=miniouser" \
  quay.io/minio/minio server /data --console-address ":9001"
If the ports 9000 or 9001 are not available for your local machine, then redirect them to other ports.
Or if you have a docker-compose file, add the service and volume for minio:
docker-compose.yml
services:
  minio-s3-storage:
    image: quay.io/minio/minio:latest
    command: server /data --console-address ":9001"
    restart: always
    ports:
      - '9000:9000'
      - '9001:9001'
    environment:
      - MINIO_ROOT_USER=miniouser
      - MINIO_ROOT_PASSWORD=miniouser
    volumes:
      - 'minio:/data'

volumes:
  minio:
If the ports 9000 or 9001 are not available for your local machine, then redirect them to other ports.
See also: Local Project Setup
Configuring the local S3 storage
Sign in via to your local s3 storage (minio via http://localhost:9001 or http://localhost:9101 with username: miniouser, pw: miniouser).
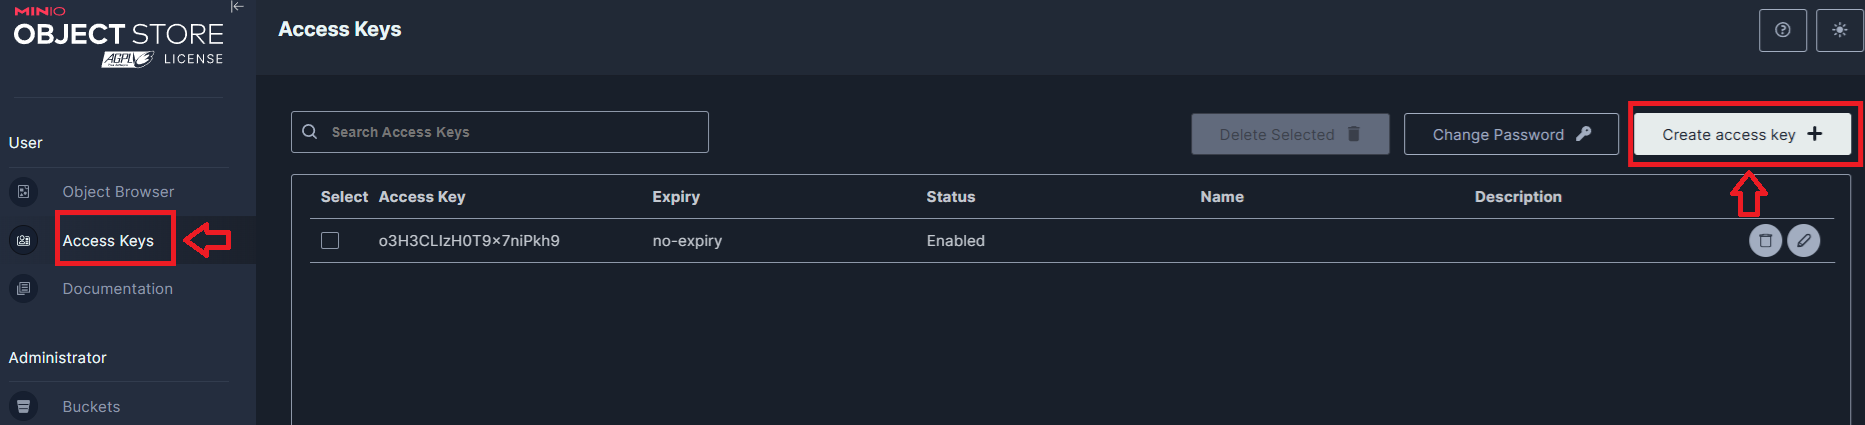
If not yet done, create an access key pair. Make sure to store the access key secret well, as you cannot re-read it after creation.
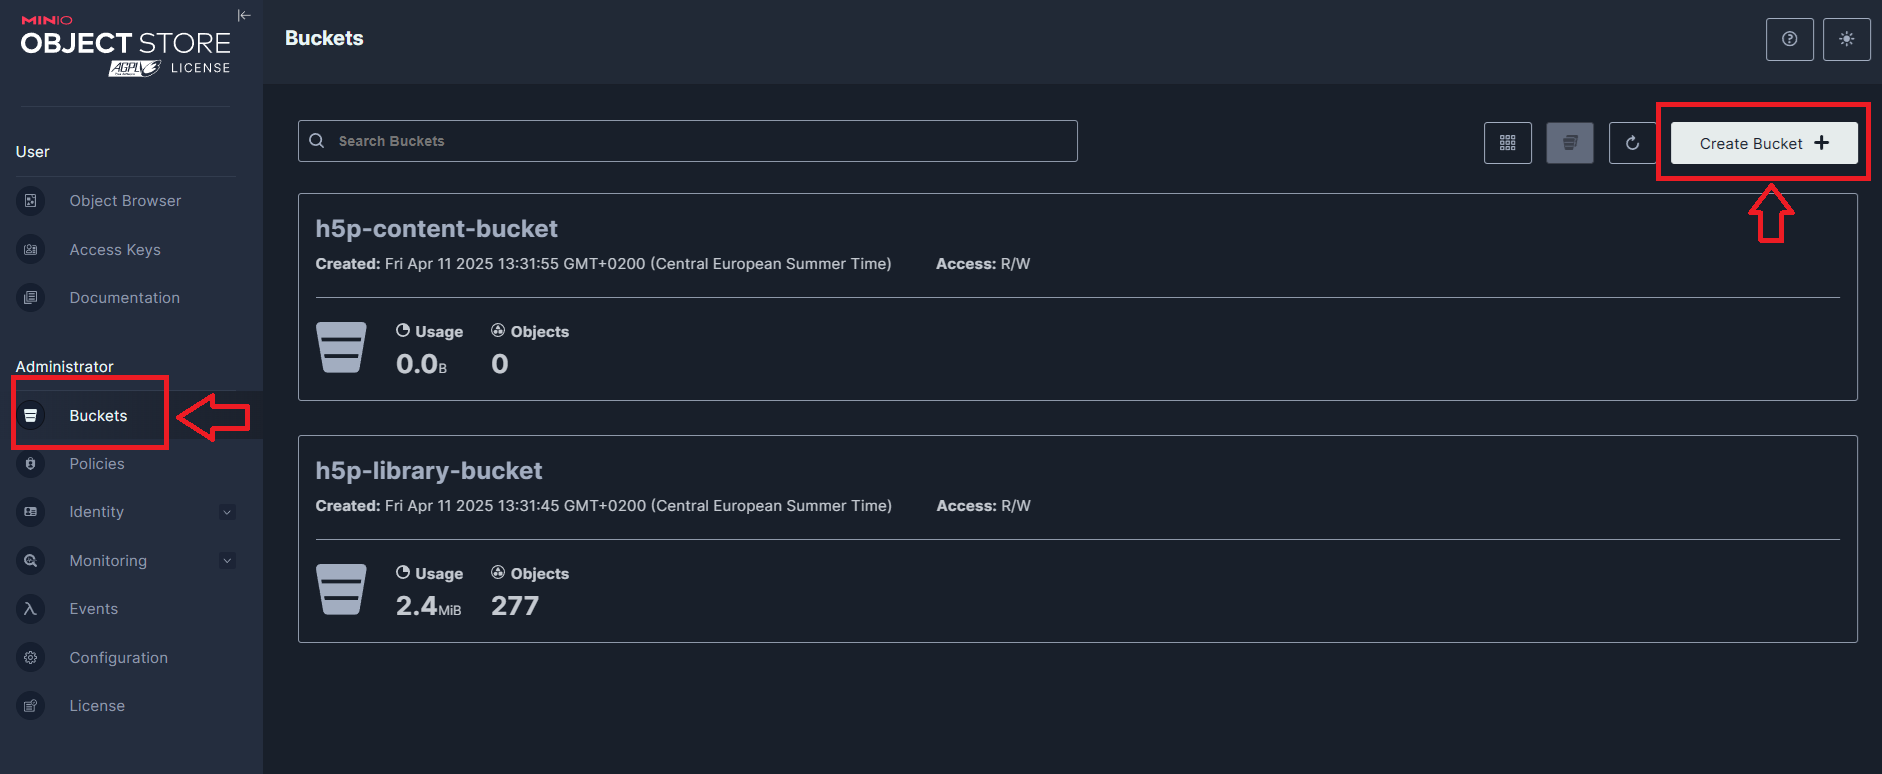
Then, add two buckets for the h5p contents and libraries with the following names:
- h5p-content-bucket
- h5p-library-bucket
You may also use any other names you prefer or even just use one bucket. If you do, make sure you adapt to the rest of the steps correctly.
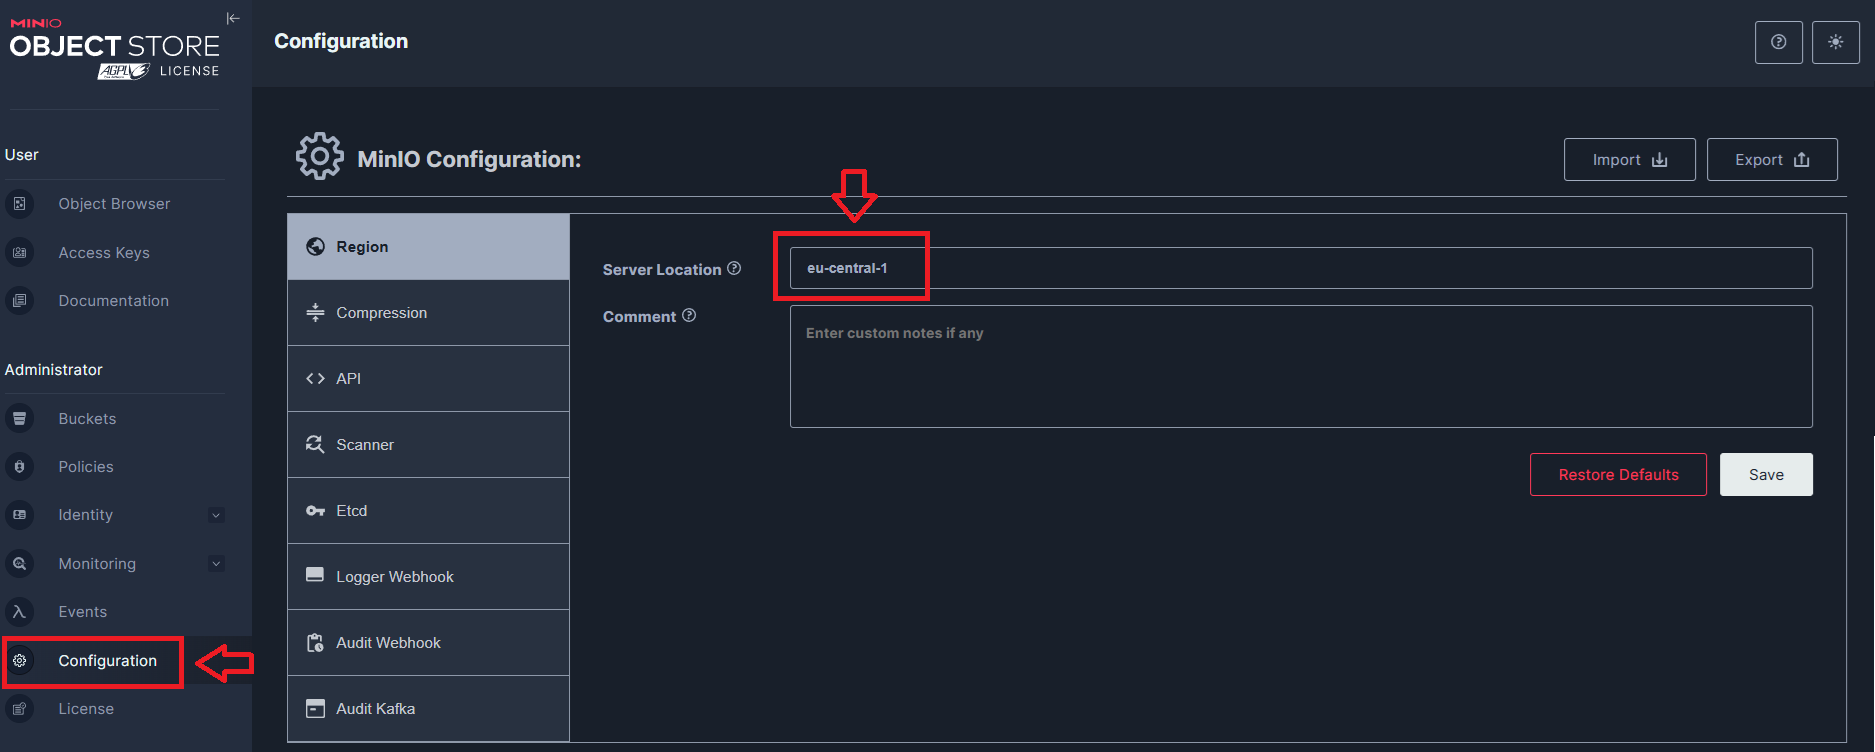
This is optional, you can also change the s3 region to eu-central-1. If you decided not to change the region, please note that the default s3 region for minio is us-east-1.
Configuring h5p for the h5p-server
Several environment variables are needed for both the h5p-editor and h5p-library management to run. Copy the
.env.development file to .env and adapt the
values according to your local setup:
.env
H5P_EDITOR__S3_ENDPOINT=http://localhost:9000
H5P_EDITOR__S3_REGION=eu-central-1

H5P_EDITOR__S3_BUCKET_CONTENT=h5p-content-bucket
H5P_EDITOR__S3_ACCESS_KEY_ID=<LOCAL_S3_KEY_ID>
H5P_EDITOR__S3_SECRET_ACCESS_KEY=<LOCAL_S3_KEY_SECRET>

H5P_EDITOR__S3_BUCKET_LIBRARIES=h5p-library-bucket
H5P_EDITOR__LIBRARIES_S3_ACCESS_KEY_ID=<LOCAL_S3_KEY_ID>
H5P_EDITOR__LIBRARIES_S3_SECRET_ACCESS_KEY=<LOCAL_S3_KEY_SECRET>
Make sure to adapt the values of the variables according to what you have. The .env.development file provides sensible
defaults for local development that you can use as a starting point.
Testing the h5p-library-management app
At this point, you have nearly everything for the library management app. The list of H5P libraries to install is
configured via the H5P_EDITOR__LIBRARY_LIST environment variable. The default list can be found in
h5p-core.const.ts.
You can override this list via ansible variables, .env files, or direct environment variables.
For example, to install only specific libraries, add to your .env:
H5P_EDITOR__LIBRARY_LIST=H5P.ArithmeticQuiz,H5P.Chart
Deployment configuration for H5P libraries can be found in the ansible/group_vars directory of the h5p-server repository.
You can run the library management app with the command (or via your IDE using the package.json):
npm run start:h5p:library-management
After the app had finished running, check in the h5p-library-bucket, if the library files are successfully installed.
You may run into problems while running the app, the troubleshooting below contains information to help you solve them.
If you remove any of the folders in the bucket, remember to remove the corresponding metadata from mongodb in the "h5p-library" collection!
Setting up the h5p static files server
To run the h5p-editor from lumi-education in the client, a static file server is needed. See H5P-Nodejs-Library-Serving static H5P core files for the client
The static files server is now part of the h5p-server repository. Build the docker image using the dedicated Dockerfile:
cd ./h5p-server
docker build --network=host -t=h5p-staticfiles-server -f Dockerfile.static-files-server .
The --network option is to avoid any possible problems regarding dns resolution which often occurs with docker in wsl. You may remove it, if it does not affect you.
Lastly, you can run the static files server:
docker run -p 8080:8080 -d --name=h5p-staticfiles-server h5p-staticfiles-server
Or if you have a docker compose file. Add the following service:
docker-compose.yml
services:
  h5p-staticfiles-server:
    build:
      context: ./h5p-server
      dockerfile: Dockerfile.static-files-server
    image: h5p-staticfiles-server
    restart: always
    ports:
      - '8080:8080'
If the port 8080 is already in used, change the first "8080" to another valid port number. Do take note of this port number; it is important.
Open a browser and test that the static files server is working correctly with the following url:
The first url should show you the text "pong", the second a picture of a green plus.
IMPORTANT : Each time the h5p-server repo is updated, you should rebuild the docker image to ensure the h5p-editor works properly.
Testing the h5p-editor app
Before starting the h5p-editor app, make sure to:
Run the latest h5p-server, schulcloud-server, -client and nuxt-client
Update or clone the latest version of the h5p-server, schulcloud-server, client and nuxt-client. See: Local Project Setup
Enable the feature flag "FEATURE_COLUMN_BOARD_H5P_ENABLED" in the .env of the schulcloud-server
.env
FEATURE_COLUMN_BOARD_H5P_ENABLED=true
Check that the h5p-staticfiles-server is running
This should already be done in the previous step.
If you changed the port number of the h5p-staticfiles-server, you will need to change it in the dev-server-config.js of the nuxt-client as well
Start and test the h5p-editor
You can start the h5p-editor app from the h5p-server directory via the command (or via package.json):
npm run start:h5p
To test if the h5p-editor works:
- Sign into your local instance of SVS as a teacher
- Create a course & board
- Create a h5p element
- Click on the empty h5p element
If everything works you should see a new window appear with the h5p-editor. The editor should contain the library you installed via the h5p-library-management app.
You may further test if the library works by creating a content out of the library.
Troubleshooting setup problems
This section lists several problems that may occur when setting up h5p locally and possible solutions to them.
I cannot open the minio console (connection refused)
Remove the docker container for minio, then run the minio container again.
Check if the ports in your docker command/compose file are correct. If you change the 9001 port to another port number, the port to access the minio console will change to the other port number!
Socket hang up/network error when connecting to the API server of minio
If you are using docker in WSL, the problem could be that your apps (i.e. file-storage, h5p-library-management) than are run in the windows environment is unable to resolve the exact "localhost" ip address of the minio api server (usually localhost:9000).
A quick workaround for this is by replacing "localhost" in the H5P_EDITOR__S3_ENDPOINT with the aforementioned exact ip address. This can be determined via the command:
wsl hostname -I
.env
H5P_EDITOR__S3_ENDPOINT=http://172.27.120.97:9000 # just an example
You may be presented with multiple ip addresses. If this is the case, then you will need to find the correct one via try-and-error (replacing localhost with each address and re-rerunning the app until no error is thrown). This is just an assumption, but the correct ip address seems to not end with XXX.XX.0.1.
Another workaround is to run your apps in the wsl. The connection is then run in the wsl network, removing the need to resolve localhost between the windows and wsl network.
The real solution to this is probably to configure the dns resolution between wsl and windows correctly. This is out of scope of this documentation and should be solved independently by yourself.
Package validation failed while installing h5p-libraries
This problem occurs when you start the h5p-library-management app and the h5p-libraries are not installed because of the following error:
Error: package-validation-failed:api-version-unsupported (component: H5P.MarkTheWords-1.11, current: 1.24, required: 1.27)
The message is confusing, but it means that the @lumieducation/h5p-server version that is currently installed is incompatible
with the library (here above shown as component) you specified. The only solutions here are either install a compatible
version of @lumieducation/h5p-server (usually by updating its version number in the package.json of h5p-server) or remove the incompatible
library from the H5P_EDITOR__LIBRARY_LIST environment variable in your .env file or change the default value in the h5p-core.const.ts accordingly.
The library-management-app runs without error, but I see no library files installed in the bucket
The app does not read from s3 which files or folders already exist. It records an entry in the "h5p-library" collection for each library that is installed. The s3 and the mongodb collection can naturally be not synced i.e. mongodb says library A exists in the collection, but the files for library A does not exist in s3. So, the app did not install the files in s3. To solve this, you can either:
- remove all library files and folders from s3 and clear the "h5p-library" collections, run the library-management app
- temporarily remove some libraries from the
H5P_EDITOR__LIBRARY_LISTenvironment variable or change the default value in the h5p-core.const.ts accordingly, run the library-management app, - add your list of libraries again, run the library-management app